Methods & Madness… Class 12: Poultry Part 2
Recipes & Ramblings from Chef School
Looking for a meal that is inexpensive, simple and delicious? This week’s classroom technique of braising and stewing makes that possible as it uses inexpensive cuts of meat and cooks an entire meal in one pot. A great example is this Moroccan Chicken with Turmeric, Mint and Olives.
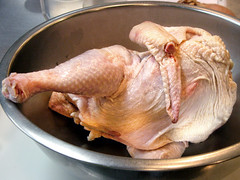
Alas, in class I had to cut up a whole chicken again! After hitting the erase button on last week’s experience, Rona graciously walked me through the harrowing procedure again. To see what I am stewing about click here for Poultry Part 1 )
Brilliant Braising
Braising is a cooking technique in which the main ingredient is seared, or browned in fat, and then simmered in liquid on low heat in a covered pot.
This cooking method dissolves collagen from the meat into gelatin, to enrich and add body to the liquid. This simple approach to cooking is used for not only poultry but for meat, fish, and vegetables.
Stewing utilizes the same techniques as braising; the difference being stew uses bite-sized pieces of food and more liquids.
The best cuts of chicken for braising are the legs and thighs even though in class we used a whole chicken. Be sure to use chicken with bones attached, as it is the connective tissue that makes the sauce rich.
Braising Poultry Step-by-Step
1. Season the chicken with salt and pepper.
2. Dredge the chicken pieces in flour.
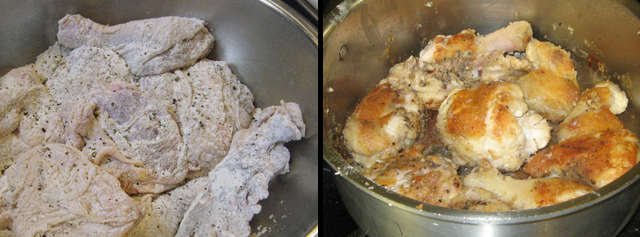
3. Sauté chicken in a heavy pan (or Dutch oven) over medium-high heat until it browns. Start with skin side down. Don’t overcrowd the pan or it won’t brown properly.
TIP: The chicken is ready to be turned when it releases itself. If it is sticking to the pan, cook longer.
No potchkying. And no, that is not a French term, it is Yiddish for fussing over something. I learned that from Rona after she whacked me with a spoon for not leaving my chicken alone while it browned.
4. Take the chicken out and pour off any excess fat. Add vegetables and cook until soft.
5. Deglaze the pan by pouring broth, wine, tomato sauce or juice. Scrape any fond that are stuck to the pan, then stir.
6. Put the chicken back in the pan and add herbs and season.
7. Cover and simmer. Do not boil as it makes your meat tough. Stir occasionally.
TIP: At this point, you could place the pan on the middle rack of an oven that has been pre-heated to 300 degrees F and cook until tender (1-6 hours depending on what you are cooking)
8. Meat is done when a fork goes in and out with ease. Remove the pan from the oven and take the chicken out of the liquid.
9. Reduce the sauce to a desired thickness by cooking over low heat until it thickens.
10. Add your chicken back in and season. Add final herbs.
Class Assignment
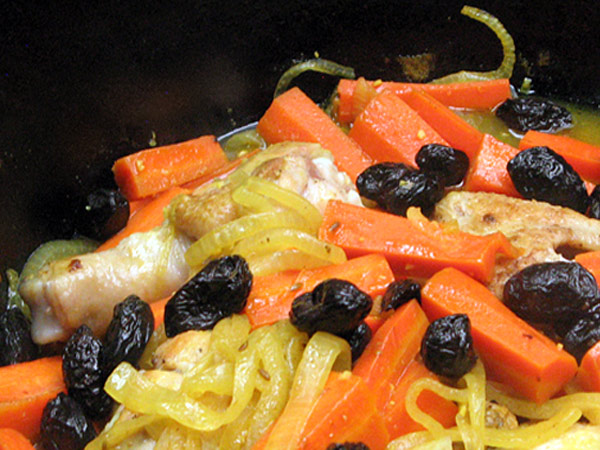
 In class we braised chicken six different ways. My assigned dish was Chicken Fricassee. It looked so much like last week’s recipe that I am going to feature a Moroccan Chicken dish that another student made. I love the rich color that the turmeric creates, as well as the health benefits.
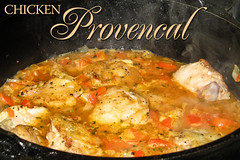
Rona prepared Chicken Provencal and it was excellent as well. Click here for the recipe.
Braised Moroccan Chicken with Turmeric, Mint and Olives
Ingredients
- 1 chicken rinsed, patted dry, and cut into 8 pieces
- salt and pepper
- 1 tablespoon butter
- 1 tablespoon olive oil
- 1 large onion sliced
- 4 medium carrots peeled, halved crosswise, then halved or quartered
- 2 garlic cloves
- 1 cup chicken stock
- 1 teaspoon ground cumin
- 1 teaspoon ground turmeric
- pinch of cinnamon
- ½ cup chopped mint leaves
- ½ cup chopped cilantro leaves
Instructions
-
Season the chicken with salt and pepper. Heat the butter and oil in a sauté pan over medium high heat. Add he chicken and sauté until browned on both sides. Remove the chicken pieces from the pan and set aside.
-
Discard all but a thin film of fat from the pan. Add the onions, carrots, and garlic. Saute. Add stock, cumin, turmeric and cinnamon, bring to a simmer.
-
Cover and continue simmering until the chicken is tender, about 25 minutes. In the last 5 minutes of cooking add the olives in.
-
When chicken is done, add the cilantro and mint.
-
Season and serve with rice.
Recipe Notes
Cook time:30 mins
Serves 4
Time Saver Tips
Braises always taste better 24-48 hours later, making this an ideal meal to prepare in advance.
Ingredients can be frozen, then thawed for use on days you don’t feel like cooking. To learn more about how to do this, check out this helpful blog.
Quote of the Day
“The discovery of a new dish does more for the happiness of mankind than the discovery of a star.” - Anthelme Brillat-Savarin
“Discovering that you’re the star of your own kitchen creates a wealth of happiness (and friends)”. – Cathy Arkle
…and then she paused for thought
Hope you have enjoyed our adventure in the culinary classroom. Join us each week as we continue learning new culinary skills.
You can also read about Rona’s experience on her blog or What’s Cookin online magazine.
Yum

Excellent straightforward discussion with some nice background. You get an A+ for an excellent kitchen lesson and a nice Morrocan recipe to boot. Thanks!
I’m impressed with your puns AND your correct use of Yiddish! Well done, my friend!
Rona, you have taught me well.
Thanks Leslie, I think I need a beautiful cake to serve with all this meat. Guess I will be heading over to http://www.bakethiscake.com to find something yummy!
I love the sauce that can be made from the braising liquid. There’s nothing like it. Now I have to go dig out my Dutch oven and get to work. You have inspired me.